Contents
- Footpath Basics
- Route Planning
- Organization
- Saving routes
- Creating custom lists
- Editing saved routes
- Merging, duplicating, and splitting saved routes
- Maps
- Navigation
- GPS workouts & trips
- Recording a GPS track
- Logging a workout manually
- Apple Health
- Understanding GPS accuracy
- Syncing workouts with other services
- Import & Export
- Sharing
- Account Management
Creating custom lists Elite
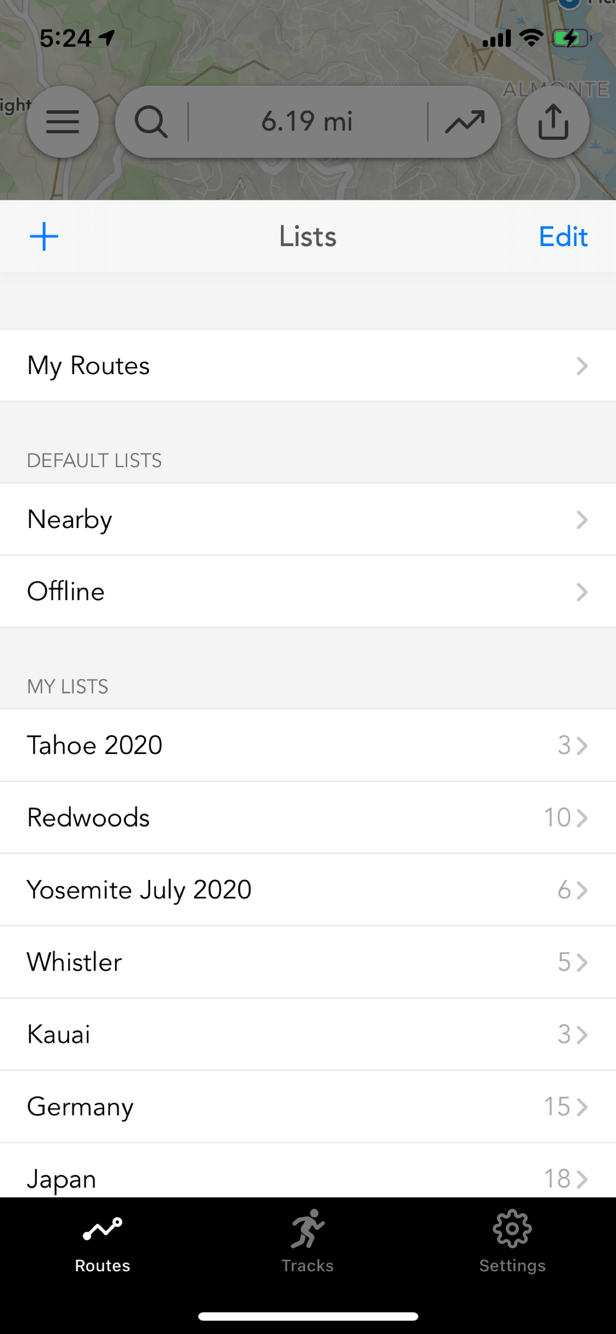
Create a list to organize your routesYou can create custom lists to organize your routes exactly how you want.
Plan out trips, organize routes by activity, or keep tabs on routes you’ve completed.
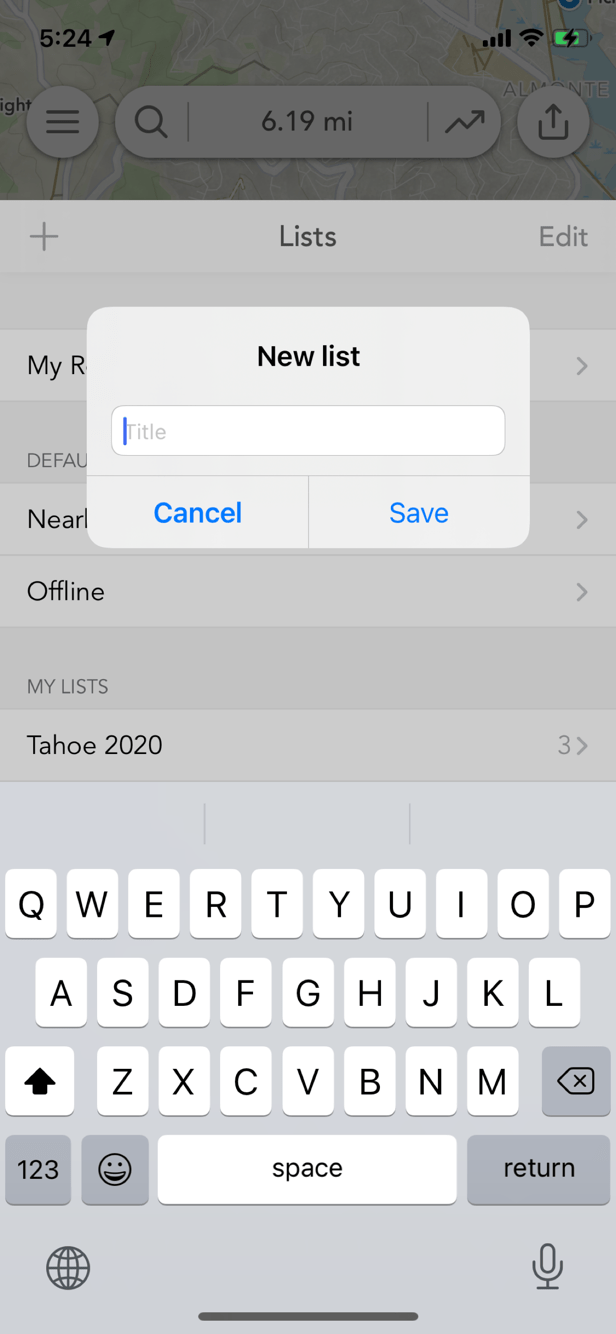
To create a custom list:
- Click the main menu icon on the top left of the main screen.
- This should open up to the “My Routes” tab. Tap the “Lists” options on the upper left of the tab.
- Tap the “+” button in the upper left to create a new list.
Default lists
By default, all of your saved routes will appear in the main “My Routes” list. Routes cannot be removed from this list without removing the route from all other lists.
There are two other default lists that will update automatically as you save more routes:
- Nearby: Shows a list of routes close to your current location
- Offline: Shows a list of routes for with maps downloaded for offline use
Adding routes to lists
You can add a route to a list in multiple ways:
- When you save a route, you can select a list to add it to.
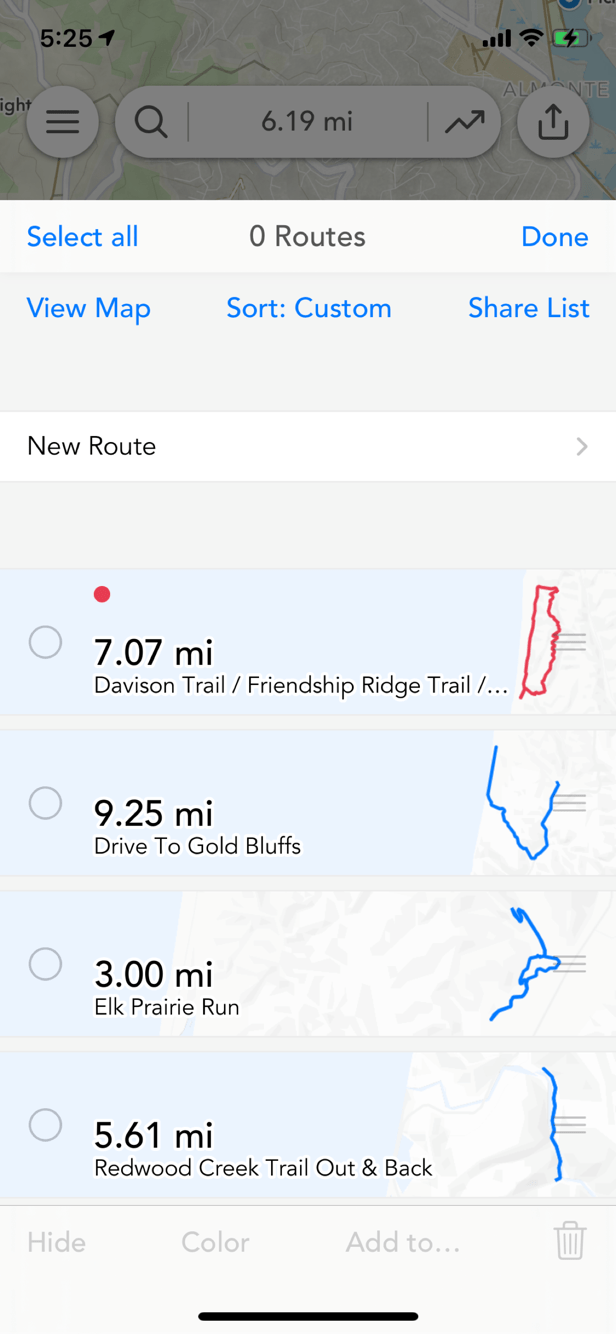
- When viewing a list of routes, tap the “Edit” button to select one or multiple routes, then select “Add to…” at the bottom to bulk add the routes to a list.
- Open a saved route, tap the “More” tab, and select “Add to List”.
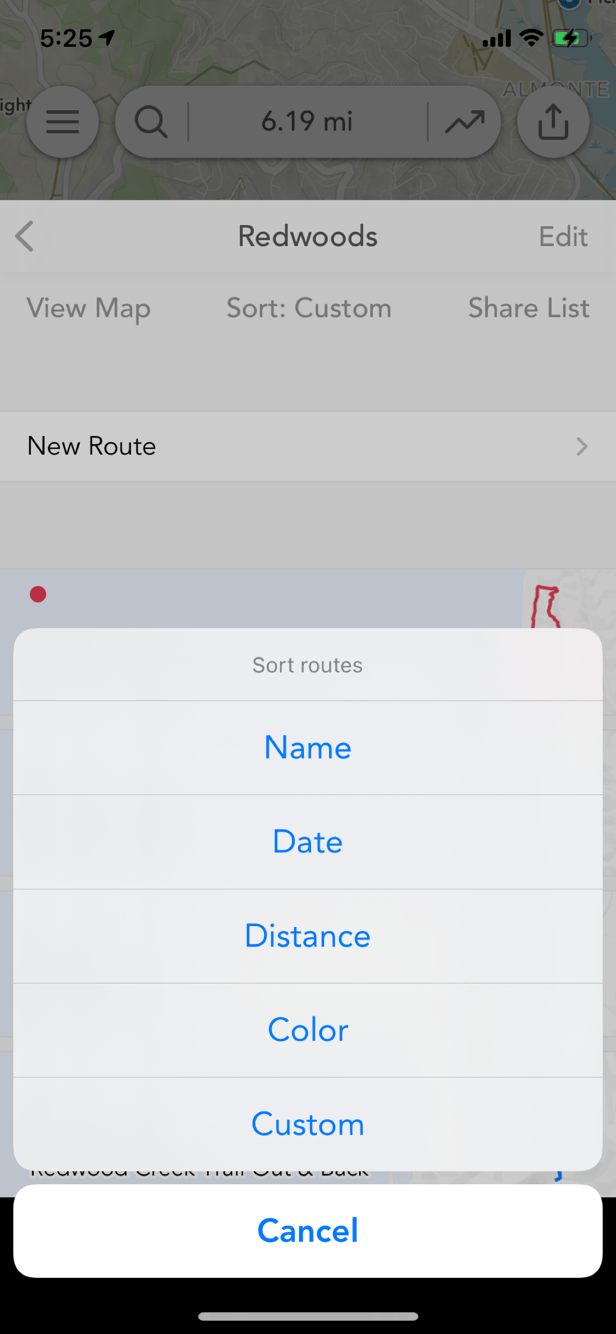
Sorting routes in lists
Once you’ve added routes to a custom list, you can tap the “Sort” button at the top to sort by:
- Name: route names in alphabetical order
- Date: most recently added routes show first
- Distance: shortest routes show first
- Color: grouped by a color assigned to the route
- Custom: a custom sort defined by dragging and dropping the routes
You can tap the “Edit” button and use the drag handles on the right to manually reorder the list of routes.
The default lists, including the “My Routes” list, will automatically show the most recently saved route at the top and cannot be manually sorted.
Grouping by color
You can color code routes in a list by tapping the “Edit” button, selecting a route, and then tapping “Color” at the bottom.
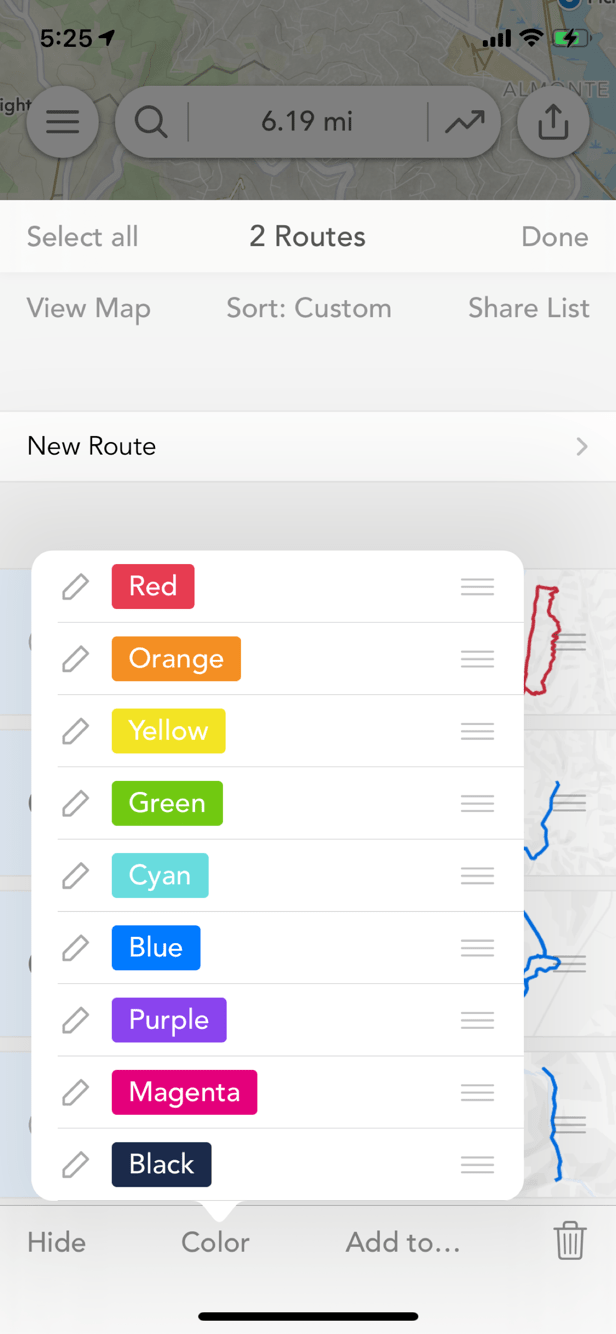
You can tap on the pencil icon next to a color in this list to rename the meaning of the color in the list.
This can be useful if you want to color code routes by difficulty, or if you want to color alternative routes differently from a main route.
Note: This feature is currently only available on iOS.
View all routes on a map
You can view all routes in a custom list on a single map using the “View Map” button at the top.
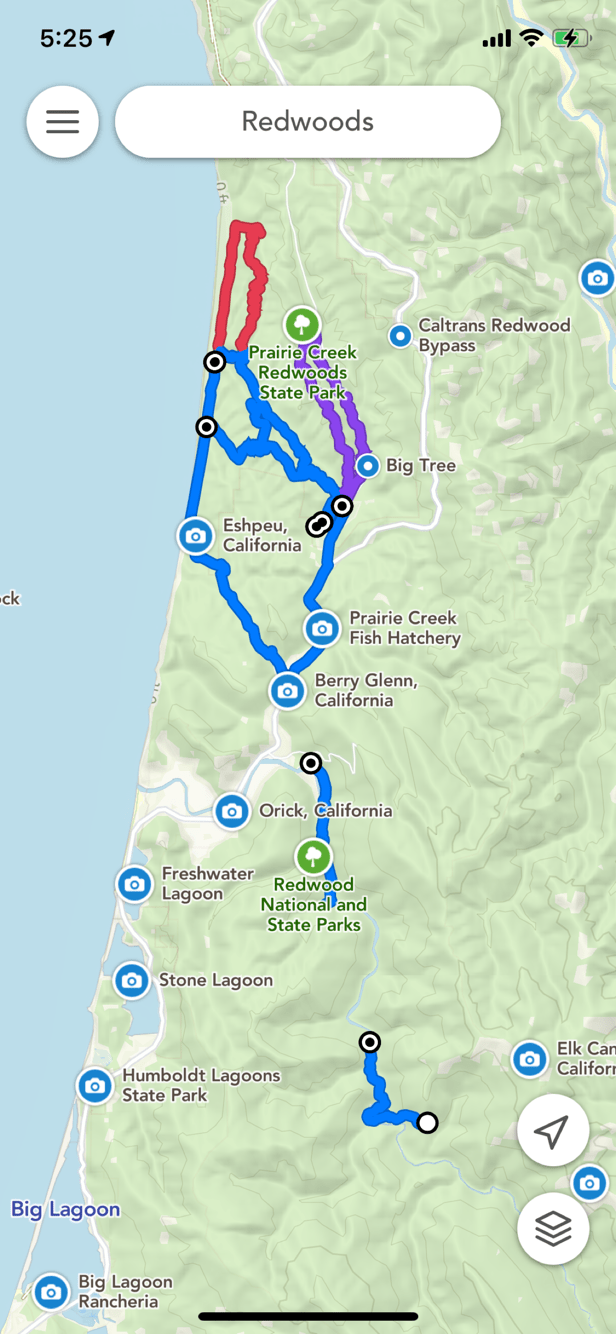
This can be useful when combined with the “Color” function described above.
Sharing and following lists
You can tap the “Share List” button to share a link to your list. Other Footpath users can open this link and add the list directly to their Footpath account. Users who do this will receive any changes you make to the list.
Some good uses of list sharing would be:
- Sharing a list of runs with your running club.
- Sharing a multiday trip plan with your companions.
Exporting lists
You can also export a list as a GPX file using the “Share List” button.
You can create a GPX file in any of the following formats:
- GPX Route: Create a single GPX file with multiple routes.
- GPX Track: Create a single GPX file with each route as a separate “track”.
- GPX Track (Multiple Segments): Create a single GPX file with a single “track”. Each route is stored in the track as a separate track “segment.”
Some apps and websites do not support GPX files with multiple routes, so you may need to experiment with the best format for the app or website you are trying to export to.
Exporting a list as a GPX file can also be useful if you need to bulk export your routes from Footpath.